At Lakeside our mission is to provide the insight you need to make smart business decisions concerning your IT systems. We work to make sure SysTrack can deliver the data required to understand, plan for, and manage the newest technology and products in the industry. In recent years the pace of innovation has really started to gather steam with things like data center modernizations, cloud-hosted services, and new enterprise software products.
Right now there’s a growing demand in the industry to offer cloud-hosted services and products, and we’ve been working with VMware to deliver an online assessment that meets that demand.
What is SysTrack Desktop Assessment?
SysTrack Desktop Assessment is an online tool that provides detailed data and reports to help plan for a migration to a VMware Horizon solution. The initial rollout of this service provided access to static reports, some interactive dashboards, and a data visualizer tool.
To enhance the service we’ve added access to additional tools, and in this blog we’ll explore how to use the Image Planner.
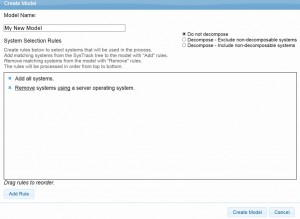
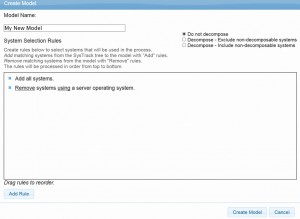
One of the biggest challenges when planning to move towards VDI is developing an adequate image plan. A typical environment could have thousands of applications, and figuring out which ones are required by which users is an extremely complex task. Image Planner automates much of the work by tracking application usage, so the suggested image plans are based on user behavior and not anecdotal evidence. Starting a new Image Planner model is simple; you just choose a name and add any system selection rules you choose, such as excluding servers.
After your model is created you have several interactive screens that enable you to tweak the model before it becomes finalized. Your options include Provision, Retarget, Automation, Delivery, and Layering. Each of these options addresses a component of the image development process and are designed to make sifting through large amounts of data seem easy. We’ll look at each of these options a little closer to see exactly what’s offered.
Provision
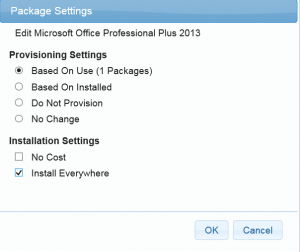
The Provision section displays a list of all installed software packages along with some basic information like version, number of users, and number of systems. The purpose of this section is to allow you to reduce the total image count and simplify the software portfolio. Within this section you have visibility into basic usage data, helping to reduce the complexity of the image models. This valuable insight drives important decisions about which packages should be included or excluded from all images. A simple example would be searching for Microsoft Office, an extremely common software package. The filtered results show me all installed Microsoft Office packages, versions, number of users, and number of systems installed. At this point I might make the decision to install the latest version of Office everywhere.
Looking at the overall software portfolio for the first time, especially when performing tasks like choosing a version of Office to install everywhere, can highlight a very common issue: The number of different versions present in the environment for the same piece of software. You might uncover ten different versions of Adobe Reader, for example. This leads us to the next Image Planner section.
Retarget
The idea of Retarget is to select a single target version for a particular software package. Sticking with our example of Adobe Reader, I can filter the results to display all the versions of Reader that were discovered. At that point I can select any of them and retarget to another version. Logically I might want to choose all of the outdated versions and retarget them to the newest version. The result is a simplified model with reduced clutter.
Automation
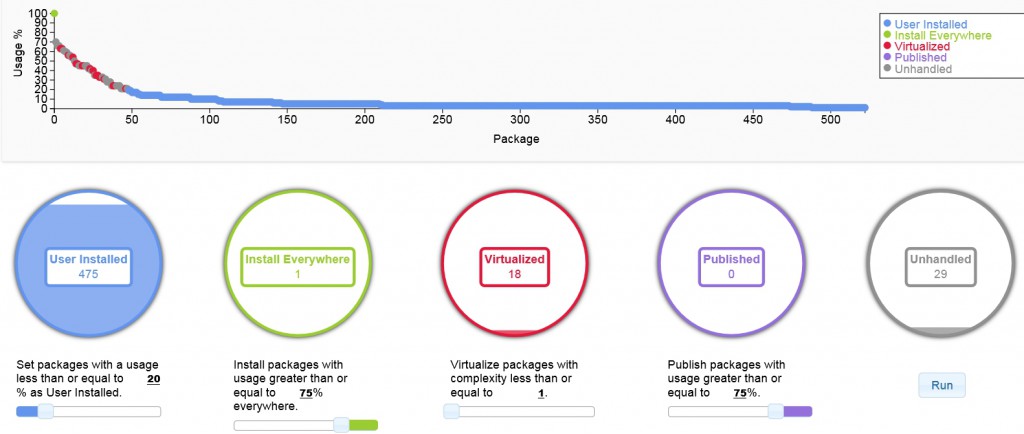
Unlike the previous two, this section allows you to make more general decisions that aren’t related to specific packages. You’re presented with sliders that let you set thresholds for whether or not a package is to be user installed, installed everywhere, virtualized, or published. You set your preferred threshold based on usage, except for the case of virtualization which is based on package complexity. This allows you to quickly update and iterate your model as you go through the process.
Layering
The layering section is a very powerful method for reducing the overall image count and simplifying your model. It allows you to automatically group users with similar usage characteristics into a layer that gets delivered as a set of software packages based on those characteristics. Before the automation is done you set the maximum layer count, minimum coverage, minimum packages per layer, and minimum machines per layer. This is a great way to automate the task of deciding which users fit best with which image. In a perfect world each user would have their own image tailored to fit their exact needs, but the complexity of actually accomplishing that is not realistic. Layering can quickly and automatically accomplish this based on which users have similar software needs.
Delivery
The Delivery section allows you to choose if a package should be delivered through a method other than installing it to the image. Your options include user installed, virtualized, or published. If a particular software package is commonly used in your environment and has a high complexity score it would be best to leave the delivery method as installed on the image. Or maybe there’s a set of packages that have a very low usage rate, you could choose to have those be user installed. This is another good way to reduce the overall complexity of the portfolio you have to manage.
After working your way through these sections and iterating a few times the detailed results for each image can be viewed through an SSRS-style report. Image Planner works to simplify what is an inherently complex task, and in doing so it can save you a lot of time and cost. Now included as part of the SysTrack Desktop Assessment service, planning for a migration to a VMware Horizon solution is much easier.
Subscribe to the Lakeside Newsletter
Receive platform tips, release updates, news and more
